A No-Waste Cast Sequence
Riprap banks quietly produced some of the most consistent bank bites across South Carolina and North Carolina this week, but only for anglers who fished them with a plan. The difference wasn’t lure choice as much as cast order—anglers who worked riprap randomly missed fish holding just a few feet off the edge, while anglers who followed a tight, repeatable sequence stayed around bites.
This article is built for bank anglers who want efficiency. If you only have a short window or you’re fishing a long stretch of riprap, this no-waste cast sequence shows exactly how to work the rock and the first drop without guessing.
What you’ll learn in this article:
- Why riprap + first drop is a high-percentage bank combo
- The exact cast order that finds fish fastest
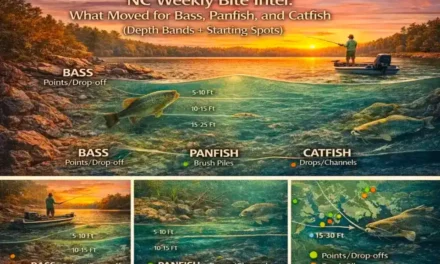
- Where bass, panfish, and catfish sit on riprap
- When to stop casting shallow and move deeper
- How to reset the sequence when bites stall
1. Why Riprap + First Drop Works From the Bank
Riprap gives fish three things at once: hard cover, heat retention, and immediate depth change. Bass, panfish, and catfish all use riprap differently, but they share one habit—most fish hold just off the rocks, not on top of them. The first drop adjacent to riprap is where fish settle when pressure, light, or temperature tightens.
This table shows how each species uses riprap and the nearby drop.
Table: Riprap + First Drop Fish Positioning
| Species | Primary holding zone | Secondary zone | Typical depth |
|---|---|---|---|
| Bass | Rock edge | First drop | 4–10 ft |
| Panfish | Smaller rock seams | Off-edge pockets | 6–10 ft |
| Catfish | Base of riprap | Deeper edge | 8–15 ft |
| Windy days | Higher on rocks | Just off edge | 3–8 ft |
| Calm/clear | Off the rocks | Deeper drop | 8–12 ft |
Understanding that fish shift inches, not yards is what makes this sequence work.
Tip: If you’re torn on whether to fish the rocks or the drop first, always fish the rocks first — then let the sequence lead you deeper.
2. Cast #1–3: Parallel the Rock Face
Your first casts should always run parallel to the riprap. This keeps your bait in the strike zone longer and targets fish that are actively feeding or positioned tight to the rocks.
Use this table to dial in your first passes.
Table: Casts #1–3 — Parallel Rock Pass
| Target | Casting angle | Best bait | Retrieve focus |
|---|---|---|---|
| Rock edge | Parallel | Jig | Bottom contact |
| Windward side | With wind | Spinnerbait | Slow roll |
| Clear water | Tight to rock | Jerkbait | Long pauses |
| Panfish seams | Slight angle | Small jig | Hover + shake |
| Catfish lanes | Stationary | Cut bait | Let it soak |
These first passes often produce the fastest bites. If nothing happens, don’t leave — the fish are usually just off the edge.
Tip: If you’re torn on speed during parallel casts, start slower than normal — you can always speed up after a bite.
3. Cast #4–6: Walk the First Drop
Once the rock face doesn’t produce, the next step is the first drop immediately off the riprap. This is where fish slide when light increases or pressure builds.
This table shows how to fish the drop efficiently.
Table: Casts #4–6 — First Drop Coverage
| Drop position | Casting angle | Best bait | What to feel for |
|---|---|---|---|
| Just off rock | Slight angle | Shaky head | Edge transition |
| Mid-drop | Fan cast | Finesse worm | Subtle ticks |
| Base of drop | Straight out | Jig | Firm bottom |
| Panfish depth | Vertical | Small jig | Grouped bites |
| Catfish zone | Soak | Cut bait | Slow pull |
Many anglers leave riprap too early — most second-chance bites come right here.
Tip: If you’re torn on how far to cast, cast just far enough to feel the bottom change — not past it.
4. Cast #7–9: Change Angle, Same Water
If the first two steps didn’t produce, the next move isn’t a new spot — it’s a new angle. Fish that ignored one approach often react to the same bait from a different direction.
Use this table to adjust angle without wasting time.
Table: Casts #7–9 — Angle Change Reset
| Adjustment | Why it works | Best bait |
|---|---|---|
| Quartering angle | Changes fall direction | Jig |
| Reverse parallel | Shows bait differently | Shaky head |
| Short pitch | Triggers tight fish | Texas rig |
| Slower retrieve | Extends strike zone | Finesse worm |
| Downsize | Reduces suspicion | Smaller profile |
Angle changes regularly turned no bites into solid hookups along the same stretch of rock.
Tip: If you’re torn between changing baits or changing angles, change angles first.
5. When to Leave the Riprap
Riprap is productive, but it’s not endless. Knowing when to move keeps the sequence efficient and prevents wasted casts.
Use this table to decide when it’s time to walk.
Table: When to Move On
| Sign | Meaning | Best next move |
|---|---|---|
| No bites after full sequence | Fish absent | Walk to next section |
| One bite then nothing | Small group | Slow and repeat |
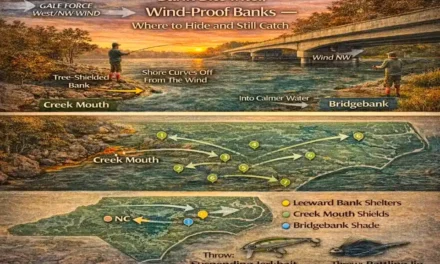
| Wind shifts | Fish reposition | Re-run sequence |
| Light increases | Fish slide deeper | Start at drop |
| Afternoon warms | Fish move up | Restart parallel |
Walking with the sequence instead of abandoning it kept anglers productive across long riprap stretches.
Tip: If you’re torn between leaving and restarting, restart the sequence once before you walk.
How to Use This Info on Your Next Trip
Riprap isn’t about luck — it’s about order. By working the rock face first, then the first drop, then changing angles, bank anglers in SC and NC consistently found fish without wasting casts.
Follow the sequence, let the rocks tell you where fish are sitting, and you’ll turn riprap from “hit or miss” into one of your most reliable bank patterns.
Your Next 3 Moves
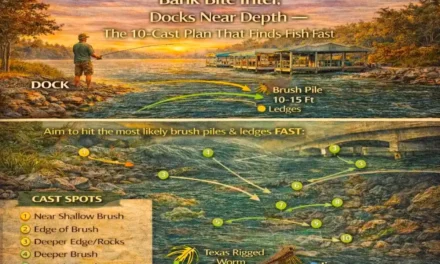
- Start here: Fish the rocks first—make your first passes parallel to the riprap to hit the fish that are tight to the edge.
- Adjust like this: If the rock face doesn’t pay, walk the first drop immediately off the riprap and slow down until you feel the bottom change.
- Move if needed: Change angle before you change spots—quarter the same water or reverse your parallel line once, then walk to the next riprap stretch if it stays dead.